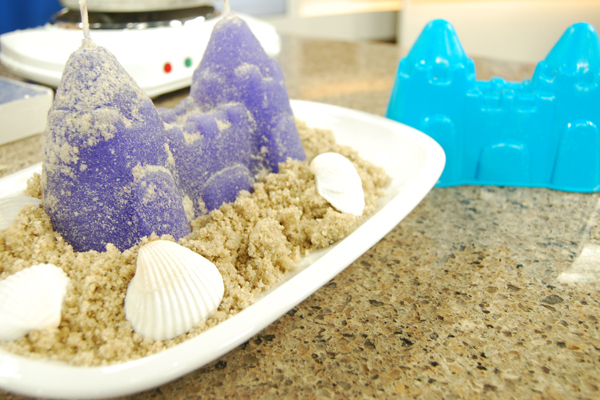

If you’re looking for a fun do-it-yourself project to do with the kids this summer, Shoana Jensen shows you how to make your own candles with a “sandy” twist.
What you need:
Candle wax (Beeswax, Soya, Paraffin, etc)
Candle dye
Candy thermometer
Scissors
Wooden spoon or long, thick craft sticks
Assorted molds
Sand
Paintbrush
Large plastic container or bucket
Candle wicks of appropriate length (the kind that has a coating of wax already)
Directions:
1. Place candle wax in a double boiler over medium heat. Stirring regularly, melt the wax completely.
2. Using the candy thermometer bring the wax to approx. 175F. If you would like a heavier coating of sand on your candle, them you can heat it to 190F. The hotter the wax, the more sand will stick.
3. Add the cake of dye to your melted wax a little at a time. Blend with a wooden spoon. Remember, the finished color will be slightly darker than the stick.
4. The sand needs to be damp to hold the mold. Prepare the sand by making adding water a little at a time and mixing with your hands.
5. Firmly pat down the sand in your container. Now press you desired mold into the damp sand. pack the sand tightly around the mold.
6. Carefully remove the mold straight up and out of the sand. If the sand wall crumbles, mix in a little more water, and begin again.
7. Place the wick in the desired position in your candle. Aim for the center of the candle so it burns evenly.
8. Pour the wax into the mold in a slow, steady stream. Don’t pour too fast, as the wax will make a dent in the sand.
9. Let the candle set until completely cool. Depending on the size, this could take 40 min or hours. To be safe, leave it as long as you can – overnight, if possible.
10. Remove your candles by digging them out and pulling up. Dust off excess sand with a paintbrush, and use scissors to cut off the excess wick and wax at the base if there is any.
Credits: All supplies need for this project came from Michael’s, http://www.michaels.com/
Courtesy Shoana Jensen, @shoanaj