
Shopping List
- Corrugated cardboard wrap aka single-faced corrugated cardboard – any width. I used 15” width.
- Masking tape or white gaffer tape
- Hot glue gun and sticks
- Plaster of Paris
Tools
- X-Acto or mat knife
- Scissors
- Hot glue gun
- Small bucket
Instructions
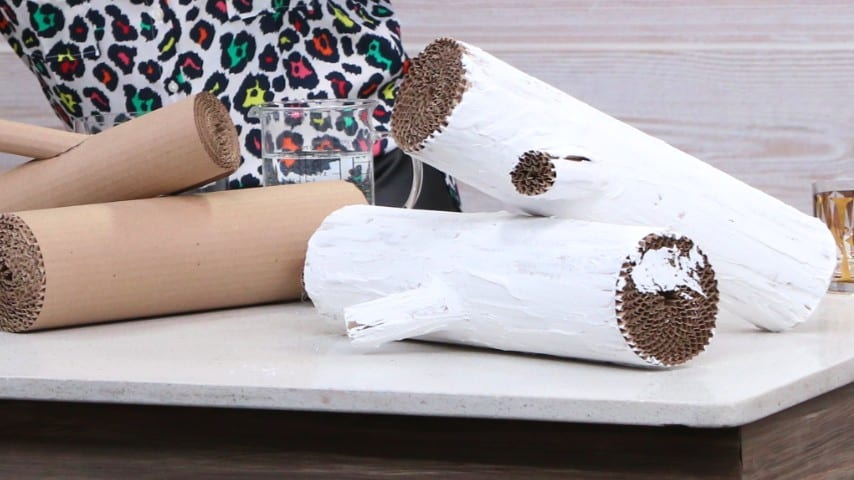
- With the ridged side out, roll the cardboard up as tight as you can into rolls of varying sizes. Cut along the ridges with the scissors. My cylinders ranged anywhere from 5″ to 8” in diameter.
- Apply hot glue along the edge of the cardboard roll. Secure with elastics or masking tape (just until the hot glue sets).
- Make 4 to 5 of these large ‘log rolls’.
- Now make several smaller rolls – only 1″ to 2″ in diameter this time, and glue closed.
- With the scissors or the X-Acto knife, cut the small rolls at an angle, about 2″ to 4″ up, then at the next 2″ to 4″ measurement, cut the cylinder straight across. Repeat. These short pieces will make the branches that stick out from the log.
- Next, hot glue the short branches to the main body of the log, with the angled side on the log. Use the masking tape to secure until the hot glue cools.
- In a small bucket mix up your plaster according to the directions. You want it have the consistency of runny oatmeal.
- Remove all the tape on the outside of the log.
- With your fingers, spread the plaster on the log with the direction of the ribs of the cardboard. Cover the sides of the log only, not the ends. You can add as much or as little texture as you like with the plaster.
- Set on parchment paper (on their ends – standing up) to let dry. Leave for several hours.
- Arrange in your fireplace hearth.